Showing posts with label Gifts. Show all posts

Tuesday, May 27, 2014

Thank You and Thanks - End of the Year Teacher Gift

When you bring home that sweet newborn the days seem so long and if you're my kiddos, then they make sure the nights are long, too.  This is girl.  This Wee One, or Cheese as we call her at home, had a big year.  She became a big sister, started preschool, and moved.  That's a lot of stress for a three-year old, so it's no surprise she will act like a threeager  every so often.
 
 
Her teacher and teacher aid were so amazing and provided stability during all of those transitions, so I wanted to do a little something. 


This is literally a little something.  Thanks to the popularity of fairy gardens, my local greenhouse is stocked with miniature plants and miniature pots. 


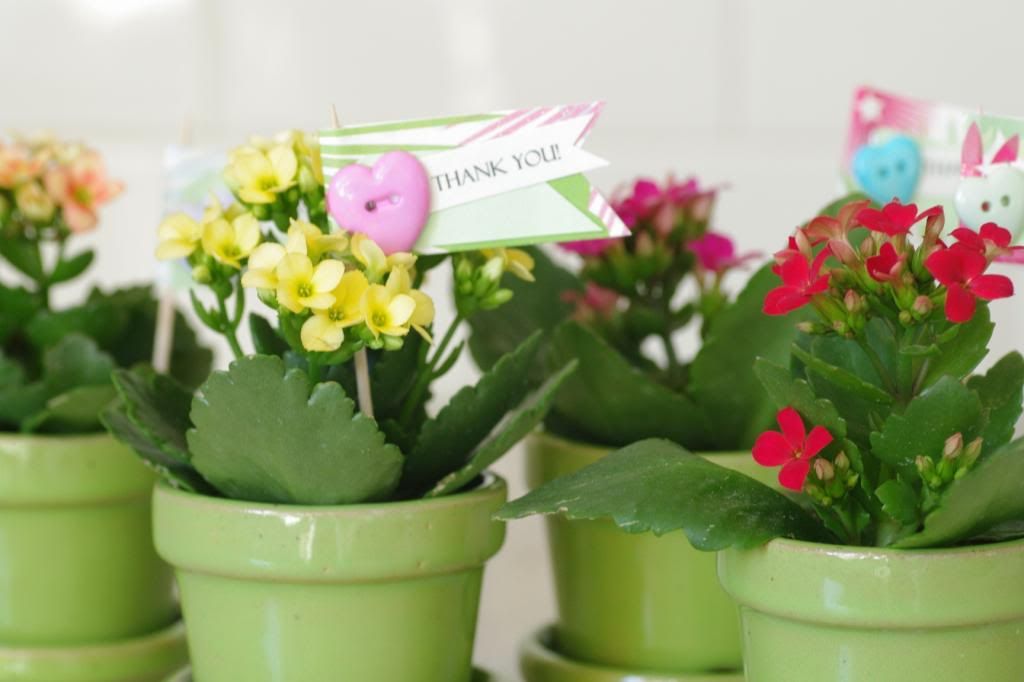
To make my life even easier, the nursery put them in these adorable boxes.
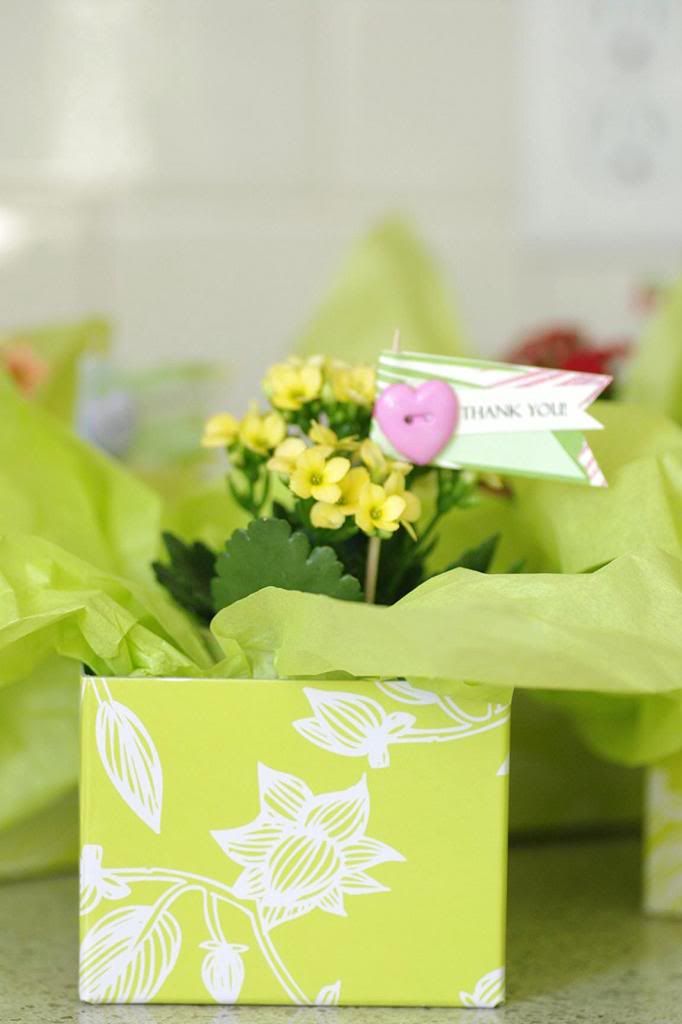
 
 
Plant - $1.99
Pot - $2.99
Thank You Flag - Free made at home
 
This teacher gift isn't cutting edge, but the it's cute and inexpensive. 


Wednesday, December 21, 2011

DIY Baby Gift

Christmas is so close that I can hear Santa and his reindeer.  I can also hear the kiddos squealing with delight as they open their gifts.  The rush is on, and if you are still stumped for a baby gift idea, I think I have the solution.  I promise it will only take a few short hours and this is coming from a novice sewer. 

Hop on over to Notes from the Patch for the most amazing and darling hooded towels.  The first one took me a few hours (and it would have been longer had my mom not come to my rescue -I did say I was a novice) but the second one was finished in 45 minutes!

You will need:
  • Bath towels (Mine are avocado from Target)
  • One hand towel (this will make two hooded towels)
  • Thread
  • Ric-rac
  • Fabric (1/8 - 1/4 of a yard)

I did not sew the hood and the towel together like the directions.  I put right sides together and sewed the seam on the inside down.


The second baby gift is a sensory blanket.  This should only take you 10 minutes (novice sewer) to complete.  I used some remnants I had left from other projects.


When pinning on the ribbon make sure your fabric has right sides together and the ribbon loops pinned on the inside.  You want the ribbon edges to be pinned flush with the edges of the blanket. 

Line up your ribbon a straighter and more even than this picture.
Again the fabric should be even on the top. 

Friday, December 9, 2011

Shhh, It's a Surprise!

Ladybug loves fairies and I love peg people.  When I saw the new (or I am late to the peg people party) fad of peg people floating around I had to make her a take-along peg doll fairy set.  The materials were bought at Michael's and JoAnn Fabrics with coupons.

The carrying/cottage for the fairies.  It is a cigar box and it soaks up a ton of paint.

The fairies house.  I am debating if I should make them little sleeping bags.  The cabinet, table, chairs, plates, bowls, cupcakes, cups, and ladybugs are movable.
The peg people fairy friends.

If time permits (Mister still needs a Batman cape) I will make a fairy felt play mat that rolls up and can be stored inside.

Saturday, August 13, 2011

It's Sew Cute

My niece turns 7 this month and she is a crafty thing.  She is really into sewing, so I put together a birthday bucket for sewing.  She was so excited to get her very own fabric and sewing book

  • Galvanized bucket
  • Ribbon for handle, bucket, and to tie fabric
  • Paint for initial, name, and polka dots on handle
  • 3 fabrics ranging (1/2 yard - 1 yard)
  • Spool of matching thread